Wipe: Gradient Removal, Synthetic Flats and Bias correction
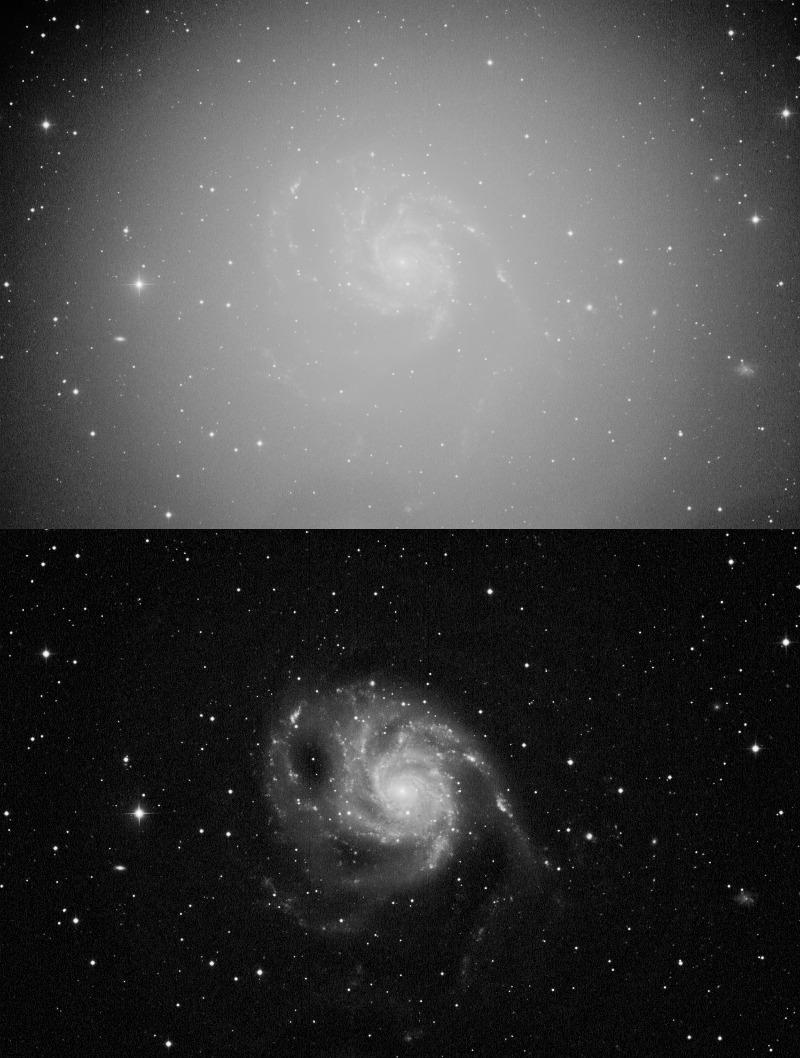
The Wipe module detects, models and removes sources of unwanted light bias, whether introduced in the optical train, camera or by light pollution.
The Wipe module upholds StarTools' tradition to solve complex problems with algorithms and data-derived statistics, rather than subjective (and potentially destructive!) manual sample setting and selective processing as found in most other software.
Usage

Wipe is able to detect - and correct for - various complex calibration problems and unwanted artificial signal sources. In addition to a gradient removal routine, it is to detect and model vignetting issues (including over-correction), as well as bias/darks issues.
Common calibration issues include;
- Vignetting manifests itself as the gradual darkening of a dataset towards the corners. It is ideally addressed through flat frame calibration when stacking.
- Amp glow is caused by circuitry heating up in close proximity to the CCD, causing localised heightened thermal noise (typically at the edges). On some older DSLRs and Compact Digital Cameras, amp glow often manifests itself as a patch of purple fog near the edge of the image.
Unwanted or artificial signal may include;
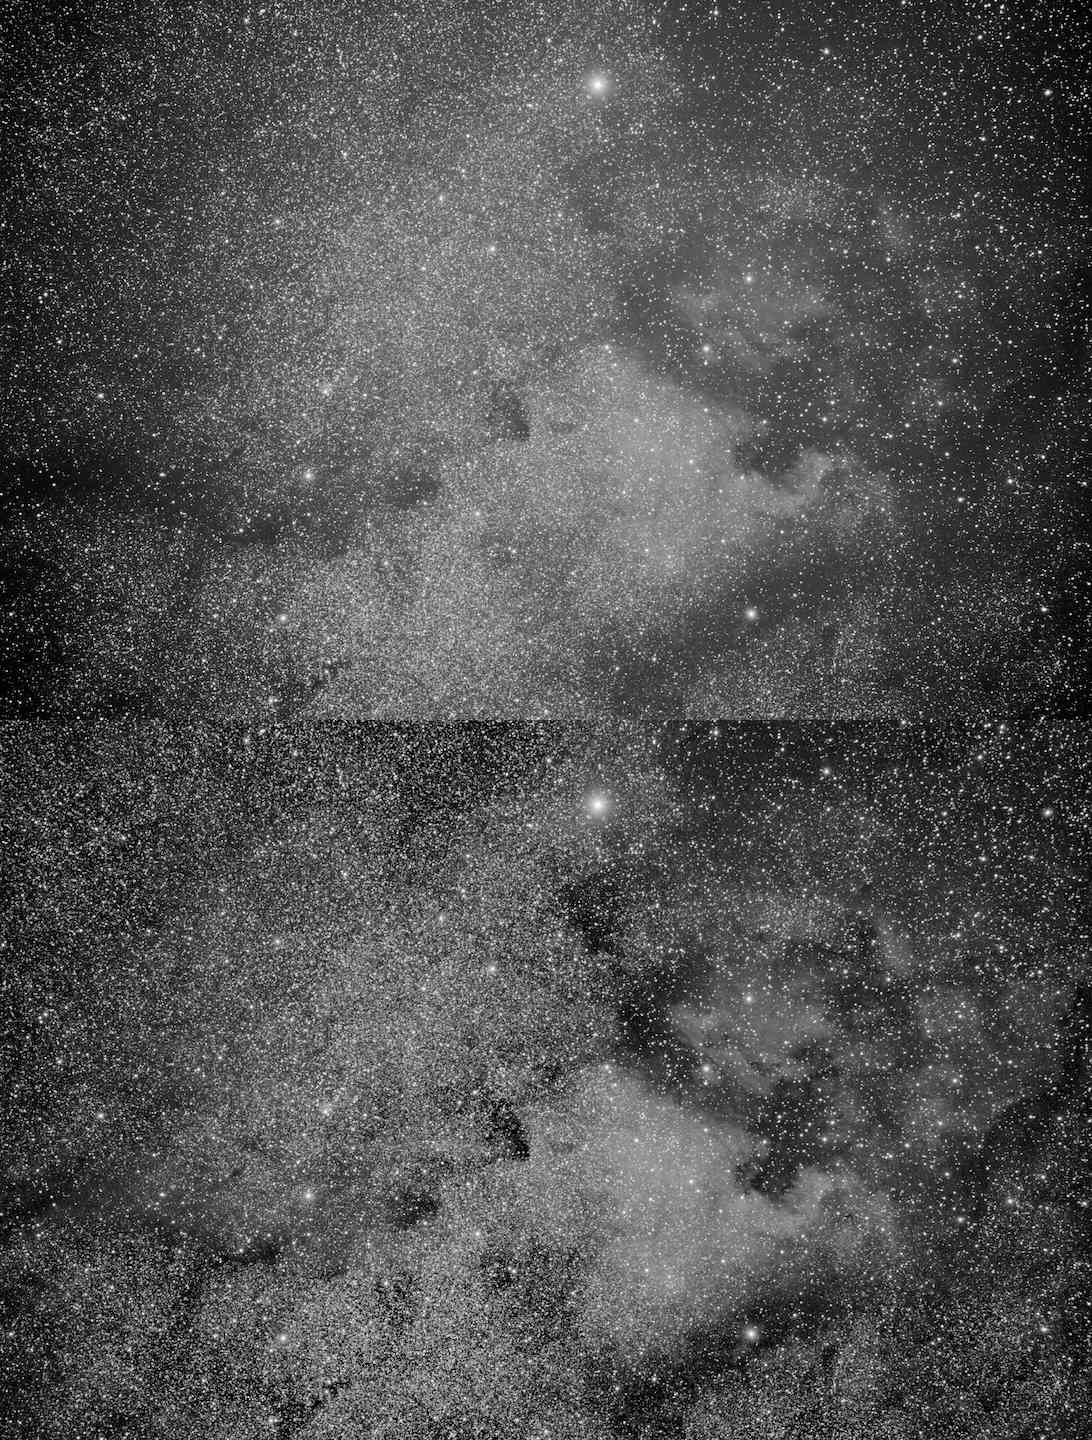
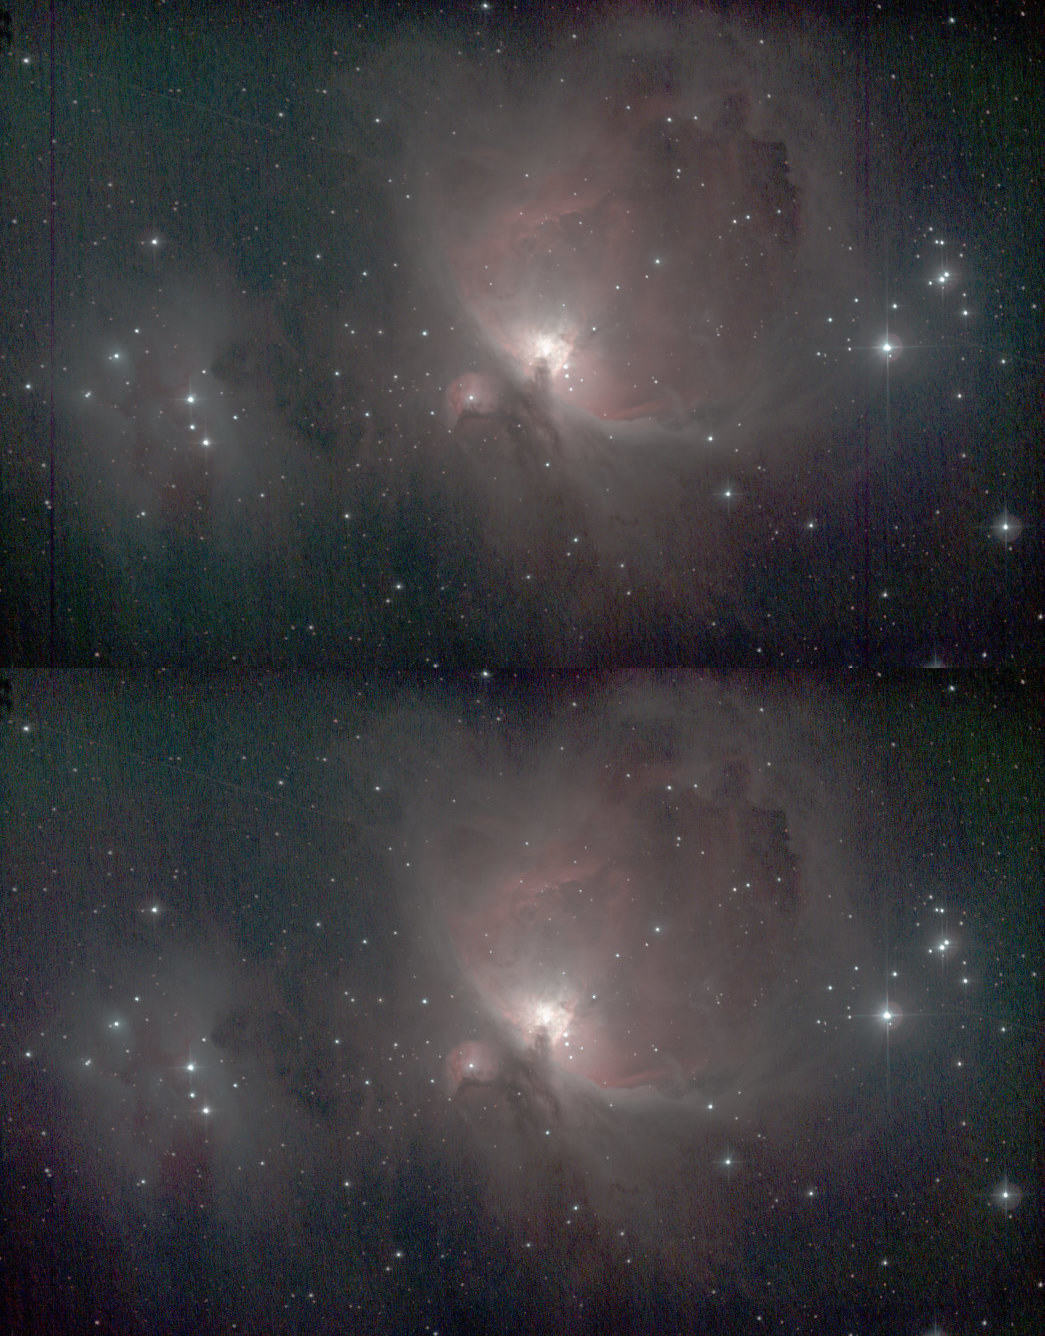
- Light pollution, moon glow, airglow, zodiacal light and gegenschein gradients are usually prevalent as gradual increases (or decreases) of background light levels from one corner of the image to another. Most earth-based acquisitions contain a gradient of some form, as even under pristine skies such gradients are prevalent.
- Signal bias is a fixed background levels which, contrary to a gradient, affects the whole image evenly. Most non-normalised datasets exhibit this.
- Amp glow is faint "glow" near one or more edges caused by local thermal noise from heat-dissipating electronics.
While highly effective, it is important to stress that Wipe's capabilities should not be seen as a replacement or long-term alternative to calibrating your datasets with calibration frames; calibrating your dataset with flats, darks and bias masters will always yield superior results. Flats in particular are the #1 way to improve your datasets and the detail you will be able to achieve in your images.
Preparing data for the Wipe module
It is of the utmost importance that Wipe is given the best artefact-free, linear data you can muster.
Because Wipe tries to find the true (darkest) background level, any pixel reading that is mistakenly darker than the true background in your image (for example due to dead pixels on the CCD, or a dust speck on the sensor) will cause Wipe to acquire wrong readings for the background. When this happens, Wipe can be seen to "back off" around the area where the anomalous data was detected, resulting in localised patches where gradient (or light pollution) remnants remain. These can often look like halos. Often dark anomalous data can be found at the very centre of such a halo or remnant.
The reason Wipe backs off is that Wipe (as is the case with most modules in StarTools) refuses to clip your data. Instead Wipe allocates the dynamic range that the dark anomaly needs to display its 'features'. Of course, we don't care about the 'features' of an anomaly and would be happy for Wipe to clip the anomaly if it means the rest of the image will look correct.
Fortunately, there are various ways to help Wipe avoid anomalous data;
- A 'Dark anomaly filter' parameter can be set to filter out smaller dark anomalies, such as dead pixels or small clusters of dead pixels, before passing on the image to Wipe for analysis.
- Larger dark anomalies (such as dust specks on the sensor) can be excluded from analysis by, simply by creating a mask that excludes that particular area (for example by "drawing" a "gap" in the mask using the Lassoo tool in the Mask editor).
- Stacking artefacts should be cropped using the Crop module. Please note that some stackers (e.g. Deep Sky Stacker) can create single column/row pixel stacking artifacts which are easy to miss without zooming in and inspecting the edges of your dataset.
Bright anomalies (such as satellite trails or hot pixels) do not affect Wipe.
Edge located dark anomalies
Stacking artefacts are the most common dark anomalies located at the edges of your image. Failing to deal with them will lead to a halo effect near the edges of your dataset.
Non-edge located dark anomalies
Dust specks, dust donuts, and co-located dead pixels all constitute dark anomalies and will cause halos around them if not taken care of. These type of dark anomalies are taken care of by masking them out so that Wipe will not sample their pixels.
Operating the Wipe module
Once any dark anomalies in the data have successfully been dealt with, operating the Wipe module is fairly straightforward.
To get started quickly, a number of presets cover some common scenarios;
- 'Basic' is the default for the Wipe module and configures parameters that work with most well calibrated datasets.
- 'Vignetting' configures additional settings for vignetting modelling and correction.
- 'Narrowband' configures Wipe for narrowband datasets which usually only need a light touch due to being less susceptible to visual spectrum light pollution.
- 'Uncalibrated 1' configures Wipe for completely uncalibrated datasets, for cases where calibration frames such as flats were - for whatever reason - not available. This preset should be used as a last resort.
- 'Uncalibrated 2' configures Wipe for poor quality, completely uncalibrated datasets. The settings used here are even more aggressive than 'Uncalibrated 1'. This preset too should only be used as a last resort.
Internally, the module's engine models three stages of calibration similar to an image stacker's calibration stages;
- synthetic bias/darks modelling and correction (subtraction)
- synthetic flats modelling and correction (division)
- gradient modelling and correction (subtraction).
Any issues specified and/or detected are modelled during the correct stage and its results feeds into the next stage.
Synthetic bias/darks modelling
The Wipe module is able to detect horizontal or vertical banding and correct for this. Multiple modelling algorithms are available to detect and mitigate banding.
A defective sensor column repair feature is also available that attempts to recover data that was transposed but not lost, rather than interpolating or 'healing' it using neighbouring pixels.
Synthetic flats modelling
The Wipe module is able to quickly match and model a natural illumination falloff model to your dataset with correction for cropping and off-axis alignment.
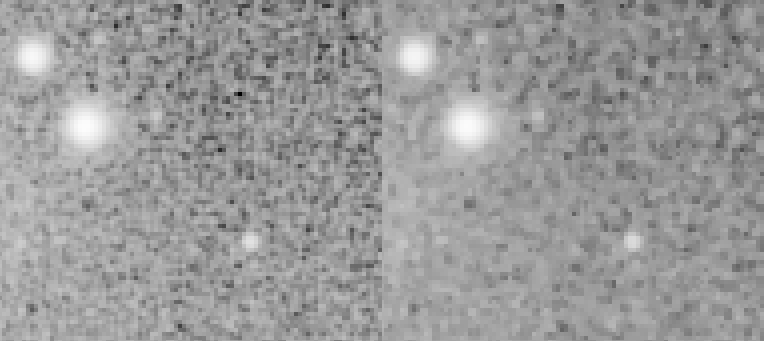
Fixed pattern noise and correlated artifact filtering
The 'Correlation Filtering' parameter specifies the size of correlation artifacts that should be removed. This feature can ameliorate correlation artifacts that are the result of dithering, debayering or fixed pattern sensor cross-talk issues. Correlated noise (often seen as "worms", "clumps", or hatch-pattern like features) and related artifacts will look like detail to both humans and algorithms. By pre-emptively filtering out these artifacts, modules will be able to better concentrate on the real detail in your dataset and image, rather than attempting to preserve these artifacts.
The usage of this filter is most effective on oversampled data where the artifacts are clearly smaller than the actual resolved detail.
Gradient modelling and subtraction
Wipe discerns gradient from real detail by estimating undulation frequency. In a nut shell, real detail tends to change rapidly from pixel to pixel, whereas gradients do not. The 'Aggressiveness' specifies the undulation threshold, whereby higher 'Aggressiveness' settings latch on to ever faster undulating gradients. At high 'Aggressiveness' settings, be mindful of Wipe not 'wiping' away any medium to larger scale nebulosity. To Wipe, larger scale nebulosity and a strong undulating gradients can look like the same thing. If you are worried about Wipe removing any larger scale nebulosity, you can designate an area off-limits to its gradient detection algorithm, by means of a mask that masks out that specific area. See the 'Sample revocation' section for more details.
After Wipe
Because Wipe's impact on the dynamic range in the image is typically very, very high, a (new) stretch of the data is almost always needed. This is so that the freed up dynamic range, previously occupied by the gradients,can now be put to good use to show detail. Wipe will return the dataset to its linear state, however with all the cleaning and calibration applied. In essence, this makes a global re-stretch using AutoDev or FilmDev is mandatory after using Wipe. From there, the image is ready for further detail recovery and enhancement, with color calibration preferably done as one of the last steps.
The diagnostics stretch
Because Wipe operates on the linear data (which is hard to see), a new, temporary automatic non-linear stretch is reapplied on every parameter change, so you can see what the module is doing. The diagnostics stretch is designed to show your dataset in the worst possible light on purpose, so you can diagnose issues and remedy them. The sole purpose of this stretch is to bring out any latent issues such as gradient, dust donuts, dark pixels. That is, it is entirely meant for diagnostics purposes inside the Wipe module and in no way, shape or form should be regarded as a suggested final global stretch.
Automatically separated luminance and chrominance datasets
If Compose mode is engaged (see Compose module), Wipe processes luminance (detail) and chrominance (colour) separately, yet simultaneously. If you process in Compose mode (which is recommended), you should check both the results for the luminance and chrominance portion of your image. Before keeping the result, the Wipe module will alert you to this once, if you have not done so.
Sample revocation
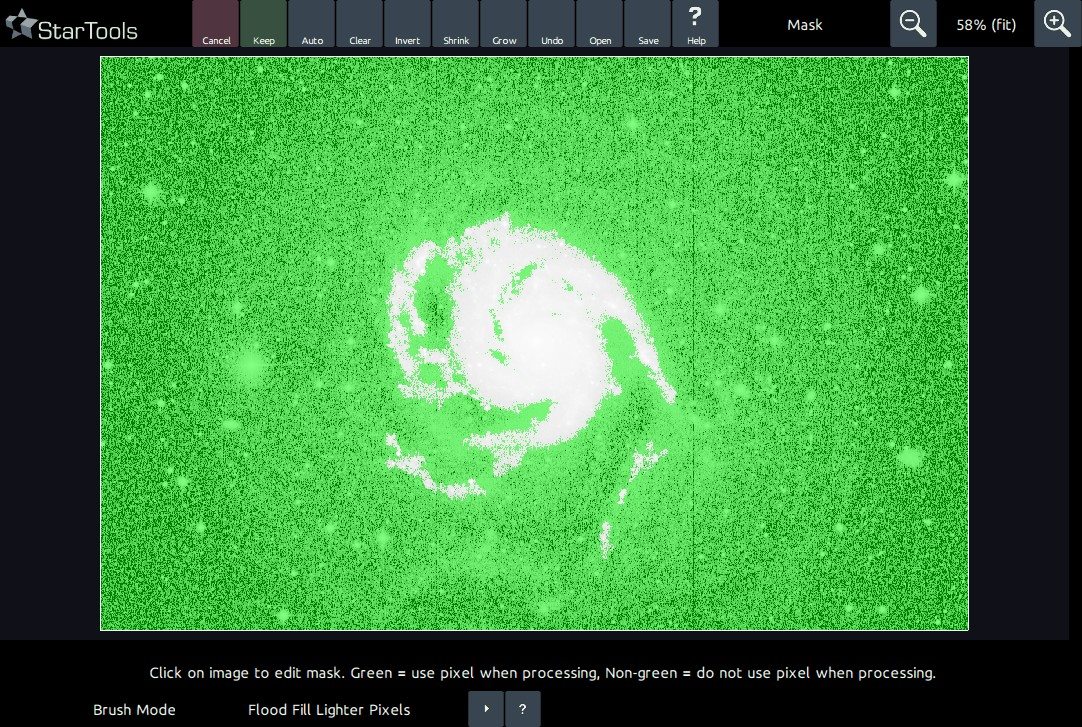
With the exception of the previously mentioned larger "dark anomalies" (such as dust donuts or clumps of dead pixels), it is typically unnecessary to provide Wipe with a mask. However if you wish to give Wipe specific guidance, with respect to which areas of the image to include in the model of the background, then you may do so with a mask that describes where background definitely does not exist.
This is a subtle but important distinction from background extraction routines in less sophisticated software, where the user must "guess" where background definitely exists. The former is easy to determine and is readily visible, whereas the latter is usually impossible to see, precisely because the background is mired in gradients. In other words, StarTools' Wipe module works by sample revocation ("definitely nothing to see here"), rather than by the less optimal (and possibly destructive!) sample setting ("there is background here").
Analogous to how sample setting routines yield poor results by accidentally including areas of faint nebulosity, the opposite is the case in Wipe; accidentally masking out real background will yield the poorer results in Wipe. Therefore, try to be conservative with what is being masked out. If in doubt, leave an area masked in for Wipe to analyse.
Design philosophy and limitations
As with all modules in StarTools, the Wipe module is designed around robust data analysis and algorithmic reconstruction principles. The data should speak for themselves and manual touch-ups or subjective gradient model construction by means of sample setting is, by default, avoided as much as possible.
In general, StarTools' Wipe module should yield superior results, retaining more faint detail and subtle large-scale nebulosity, compared to basic, traditional manual gradient model construction routines. However, exceptions arise where gradients undulate (e.g. rise or fall) faster than the detail in the image due to atypical acquisition issues (incorrect flat frames, very strongly delineated localised light pollution domes). Human nor machine will be able to discern detail objectively or with certainty. As a result Wipe will, likewise, struggle in such cases.
You may also be interested in...
- L. B., United States (under Testimonials)
I'm relatively new to image processing and just wanted to say how straight forward and powerful StarTools is.
- Shrink: Star Appearance Manipulation (under Features & Documentation)
The Shrink module offers comprehensive stellar profile modification by shrinking, tightening and re-colouring stars.
- Interface (under Introduction)
Exclusive to the main screen, the buttons that activate the different modules, reside on the left hand side of the main screen.
- Using the Heal module with StarNet++ (under usage)
This guide lets you create starless linear data using StarNet++ and the Heal module.
- Stereo 3D: Plausible depth information synthesis for 3D-capable media and Virtual Reality (under Features & Documentation)
The Stereo 3D module can be used to synthesise depth information based on astronomical image feature characteristics.